Τετάρτη 25 Σεπτεμβρίου 2013

40K Campaign - The Battle for Rozak - Turn 1

TURN 1 (Battles fought throughout 2012)
Strategic Map- Orbital and Land Operations - Turn 1

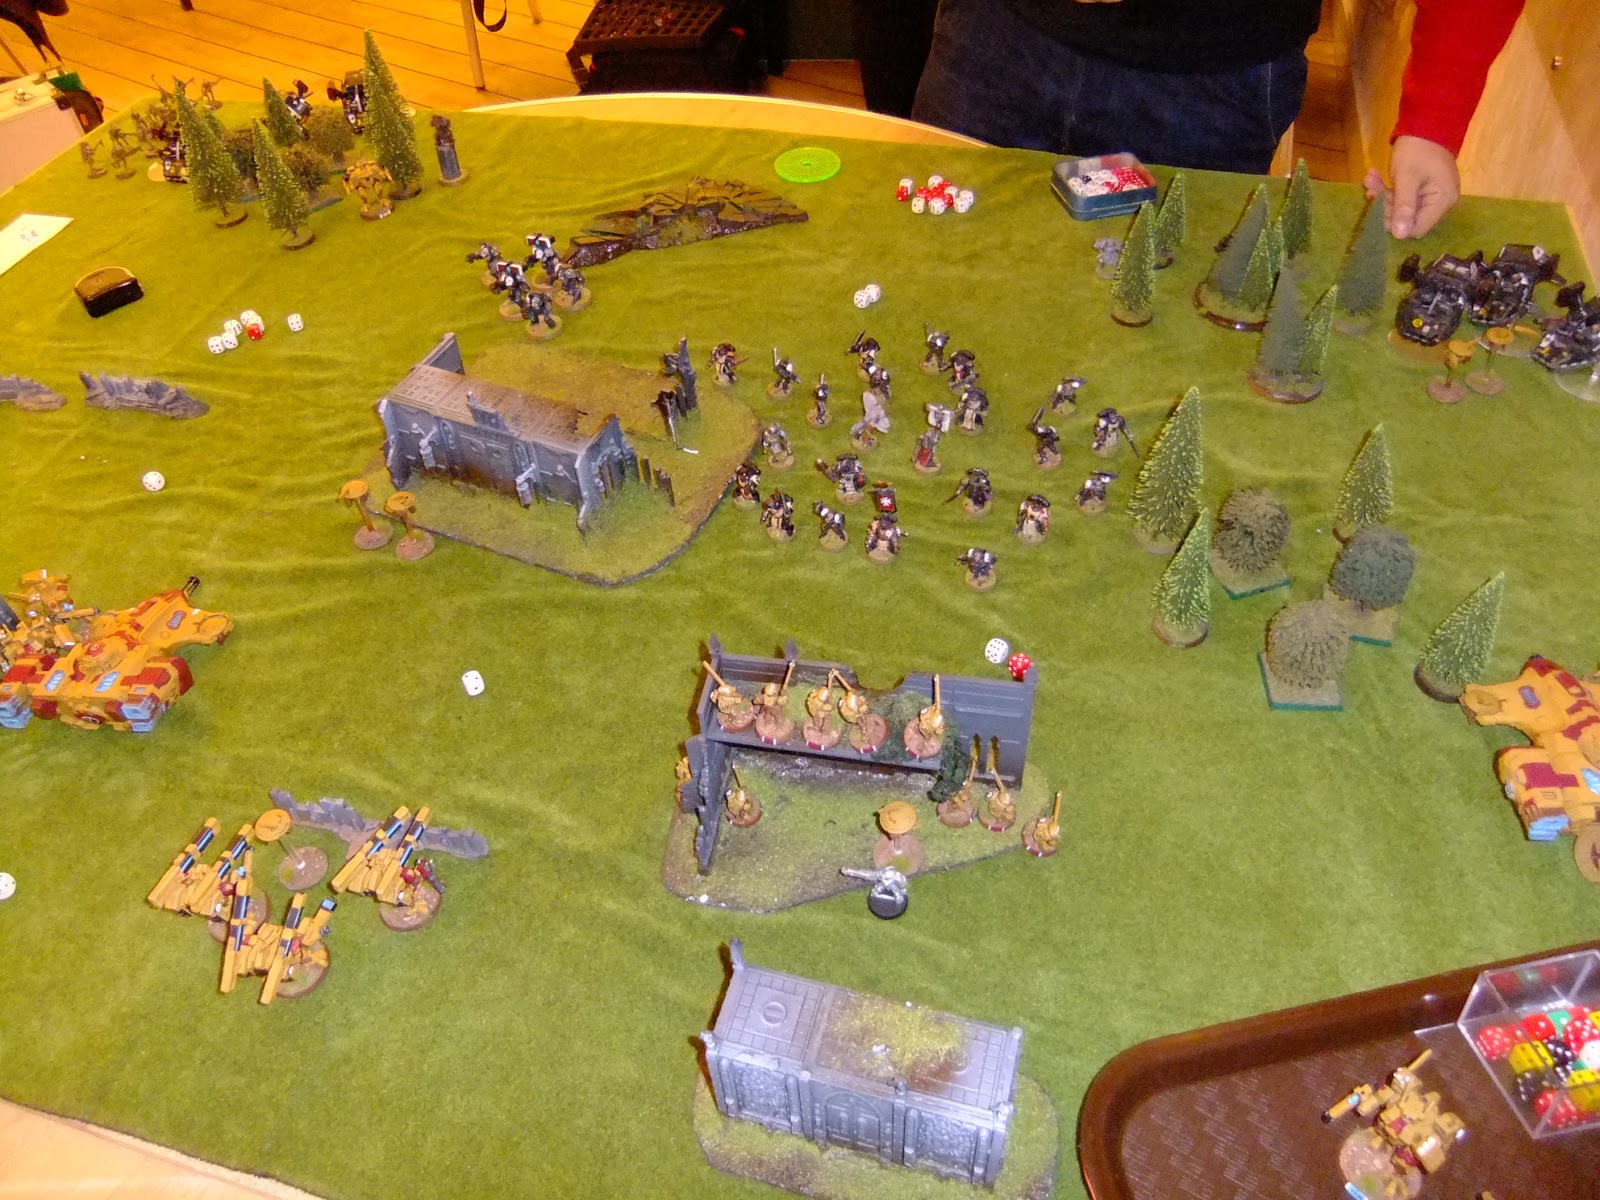
After an inconclusive engagement between the two fleets, the Imperial navy landed their troops, deploying the Mechanized Command in LZ 1, the Airlanding Command in the LZ 3, while the Salamander elements secured the LZ 2. A landing force was fragile and disorganised until it achieved cohesion, but the Shas'O knew that the Landing Zones were supported and dominated by Imperial Air power, whose strafing runs were rightly feared. Not having the numbers to withstand such bloodbath, Lanc'el ordered his troops to wait and ambush the enemy in other spots. But the impetuous garrison of Port Rozak, reinforced by a volunteer regiment of the city's lower classes, set out to the nearing LZ 1, and attacked massively against the planetstriking Imperials, ignoring the SHas'O's orders. If the attack succeeded, the LZ would be abandoned, and the Mech Command's stragglers would retreat to the hill "Point Zero" (16) where they would make a last stand. Rozakian infantry and militia set out to capture the zone's objective, but they were met with stiff resistance by a wall of chimeras and hellhounds, and volleys of Imperial squads that were just deepstriking all around them. Imperial fighters were strafing the rebels from the onset of the battle, and the attack ultimately failed, thus securing the LZ for the Imperium and giving them the battle initiative to attack either Port Rozak and the Starport to the south or the strategic Riverland Bridge (13) to the east.

The Airlanding Command landed in LZ 3 unopposed. Opting for a quicker assault against the Capital, they did not seize the Mining Facilities (6), instead dashed forward to engage the Strongpoint (8) guarding the pass to the Capital. But when they crossed the Rockmount Canyon (7), the Tau sprung their trap. Well hidden and determined, the Tau forces had the Imperials surrounded before opening fire. Railguns and missiles downed one Valkyrie after another, while Crisis suits descended upon the ground forces, ripping open the Chimeras, burning guardsmen screaming out and dying. The intervention of Imperial Spec-ops did not remedy the situation, and the forward element of the Airlanding Command was shattered, giving the Tau and their Allies their first victory.

The aggressive nature and the recklessness of the Salamanders paid out greatly, since not only did they secure their LZ, but they immediately mounted a drop-pod assault operation against the Governor's Mansion. A successful 4+ roll resulted in the Governor actually being in the estate at the time of the attack, and the Tau bodyguard force had to hold for 6 turns to successfully evecuate him. The Drop Pods landed in point blank to the estates fortifications, Salamanders pouring firey death and hot melta upon the Fire Warriors posted there. Responding to the emergency signal, Crisis suit teams deep striked into the fray, gunning down power-armored foes, and dying in the process. In the end, the Tau force not being able to effectively engage in long range firefight, cornered from the first moment by the Emperor's Finest, was completely wiped out, the Planetary Governor captured and summarily executed for high treason and Heresy. (The failure to protect the Governor was corrosive to the Rebels' morale. From now on, every Rozak Guard unit not accompanied by a Commissar or a Senior Officer suffers a -1 to its Ld checks)

40K Campaign - The Battle for Rozak - Prelude


Rozak System, Eastern Fringe, M41.972

General Geographic Notes: Rozak System includes 4 planets, but due to extreme climate conditions only Rozak Prime is inhabited. The Planet is almost entirely covered by water, hiding significant quantities of oil in its depths. Although it would seem absurd to use ships in the 40th millenia, it was the most cost-effective way of transporting oil from the mid-ocean wells to Rozak Port's refineries. Also, Rozak mines to the south, produce the much wanted metals, vital to the planetary economy. The Hive City itself, flanked by impenetrable jungle and highland plateaus, is fortified against land and air threats. The population was fed by the fertile plains near the single river, although during the last months those lands were giving way to an arid wasteland, growing at a strange rate.


During the 4th Sphere of the Tau expansion, the Rozak Planetary system was included to the Tau's ambitious expansionism. The close proximity to the Tau Dominion, the vast distance from Holy Terra and the negotiation skills of the Water Caste's diplomats, all resulted in a swift and bloodless secession to the Greater Good.
The population, disgruntled by high Imperial taxation, greeted their new allies fervently. But fearing the immediate Imperial retribution, the planetary High Governor pleaded the Tau for military assistance. Indeed, part of the Tau fleet remained in orbit and landed mobile formations on key points of the surface.

Commander of the Fire Caste Cadre was the Shas'O Lanc'el'Ot, a skilled leader that quickly assessed the situation and concluded that:
Rozak Prime (Capital Hive City), Port and "Defiance" Starport were the key objectives.
Riverland bridge, Strongpoint Alpha and Red Point were local strongpoints that should be manned and held.
Also, due to the flak batteries' dispersion and coverage, three possible landing zones were available (LZ I,II,III).
Strategic Map- Orbital and Land Operations - Prelude

The Imperium's wrath fell upon them earlier than expected. A Cadian expedition, having just quelled a rebelion in a nearby world was ordered to intervene, with one armored and one airlanding formation at 100% readiness. Along them, a Company of the Salamanders Chapter, eager to bring retribution to the hated xenos and their unforgivable human collaborators.

The pieces were set and the conflict was about to begin, but the 40k universe was dark and full of terrors. None had noticed some weird dots in the outer space, a dark omen that would render the humanoids' disputes rather insignificant, in the great scheme of things..

Τρίτη 29 Ιανουαρίου 2013

FOW scenery

Scenery time! Let's see what we're fighting on, at 15mm scale. Except the ruined buildings, all others are custom-built, cheap and easy to make.
A bridge crosses the steep river 
Ruined houses (which means I possess two Jagdpanthers! )
A close-up on the last bridge
(that river badly needs some water-effect)

Rural roads

British advancing cautiously

A small hill, wooded patch and swamp (or flooded field)

A standard bunker and an enfilade one

A wannabe Maginot line (minefields, barbed-wire, bunkers)

Breaching. Get'em lads!

Aerial view

Τετάρτη 19 Δεκεμβρίου 2012

ICT IV - part 2


Third Battle was against the Ruinous Powers again, on my first round's battlefield again. Juggerlord and spawn retinue, 2x2 nurgle Obliterators, Sorcerer with cultist blob, another cultist blob, marine warband on Rhino and.. 2 Helldrakes.
The Relic! mission, centered on the middle, Hammer & Anvil deployment. I deployed to punish the enemy contenders, as well as to throw my troops in for a quick grab. The Juggernaught mounted lord was stripped off his retinue easily, but they had transported him safely near my lines (cavalry is really fast! ). Due to sheer bad luck, the Chaos Lord didn't reach my Crisis team Honour Guard and was killed, giving me the upper hand (had he reached me, he would tie and kill my Commander and 3 XV8s). The Chaos scum that grabbed the Relic soon regretted it, killed to a man by hot plasma and powerful pulsefire. Now was my turn to grab the Relic and run towards my lines. Having achieved the secondary objectives of Slain Warlord, Line-Breaker and First Blood, I was confident about the future. Then came the Helldrakes. Diving, grabbing Tau with their talons and roasting others in baleflame, they decimated my infantry, leaving no way to control the Relic. The chance was seized by the Sorcerer, who ordered his cultist rabble forward, entered the building and got hold of this piece of knowledge. They only had to hold for 2-3 rounds, gone to ground inside the building until the game ended or passing it to the fresh cultist squad heading their way. While the Broadsides were at last bringing down both Helldrakes, concentrated fire from 3 vehicles and 7 Crisis Suits eradicated the Sorceror and his retinue, dropping the relic, just as the second cultist squad made contact with them. It was now their turn to taste the Tau firepower.. Electing to GtG, they couldn't move, thus being unable to grab the Relic, standing about an inch near them..
Tau Victory 3-0, though if the Chaos Lord had struck home, it would be really unpleasant for the Greater Good!

Last game of the Tournament was a standard pitched battle with Kill-Points. In the lush jungles of a deathworld, the Tau force made contact with a unholy alliance, Dark Eldar and a Guard detachment!
Due to my little knowledge of DE, I regarded all of them as.. T3 low armored elves with poisonous weapons, long sticks hurt armor and suits badly, leaders are unkillable frenzy machines. The DE list was ill-suited for KP missions, having 2-3 3-man squads and fragile vehicles. His assault units advanced, duke Sliscus and his wyches aboard a Raider dashed forward, hoping to withstand enemy fire and engage in "child's play" melee wiht the Tau. Their transport went down first, then the frustrated passengers were marked by the pathfinders, stripped of their cover and cut to pieces. On the other flank, the numbers of the Guard infantry were winning the gunfight, and outflanking kroot were ordered to intervene. Achieving light damage, they were the only kill point to yield. All along the battlefield, Crisis suits were assuming aggressive stance, closing into rapid-fire distance, pounding the GtG aliens, then Jump-packing back to safety. The Dark Eldar were trying to grab easy kill-points, Dark Lances seeking Tau vehicle armor plates. Due to the Disruption Pods, their accurate and powerful shots only immobilised one Devilfish. Owing to my Warlord's trait, the flying squadron of 2 Vendettas arrived on the last game turn, shooting once, doing nothing (disruption pods again! ). It was an easy win, nearly 10-1..
Mid-game..

And the final results: 7th out of 32, with 7 points and 5384 game points out of the possible 7000 pts max. That means that only ~1600 enemy pts have escaped the Tau menace (the best player got 6215 pts, genocide!! )
Mission successful.
Afterthoughts. I had a really nice time, my enemies being sportmanslike and fair.Looking forward to attending the next one, in Feb-March.
Tau are nice and strong, they just need some more variety in their choices, plus some more durable troops. It is a headache to grab and hold relics or objectives, but they pack a real punch against most other forces.

ICT IV - part 1


Last month I attended the most lavish 40k tournament in Greece, the Independent Club Tournament IV, competing against experienced player, well-painted armies, and among eye-catching terrain pieces. Rather inexperienced with Tau (and surely lacking combat tests), I fielded the following:

Shas'O (plasma rifle, Missile pod, multi tracker, 2 shiled drones, blacksun filter, stimulants)
3 XV8 (plasma rifle, Missile pod, multi tracker, 2 shiled drones, blacksun filter)
3 XV8 (plasma rifle, Missile pod, multi tracker, 2 shiled drones)
XV8 TwinLinked Flamer, Multitracker)
10 kroot+hound
10 FireWarriors ('ui, blacksun filter, gun drone, bonding knife)
6 FireWarriors
7 FireWarriors in Devilfish (Disruption Pods, Flechette Dischargers)
8 pathfinders ('ui, blacksun filter, gun drone)
Transport Devilfish Marker Beacon, Disruption Pod)
3 XV88 (TwinLinked PlasmaRifle, Multi Tracker, 2 shield Drones, blacksun filter, 'vre has Target Lock)
Hammerhead (Railgun, burst cannons, Target Lock, Flechette Dischargers, Disruption pod, Multi Tracker)

The list combines the fundamentals for me, and is interesting to play with. Transports for the vulnerable troop infantry, indestructible vehicles (due to the disruption pod), many Crisis Suits (the reason why we play Tau), the compulsory markerlights, lots of plasma, lots of Rails, plus some outflanking harassment.
Four games, 32 players, objective: to avoid the last places of the final rankings!

First game against a crusading company of Black Templars. A large squad of trainers and trainees accompanied the Emperor's Champion and the Chaplain, a squad of Termies, 2x5-man objective-holder marines, 2x3 LandSpeeders. Packed with Typhoon missiles (16 kraks per turn) they could spell doom to my Suits.
Two objectives per player, deployed at the edges of each deployment zone. Broadsides holding the centre, Crisis and troops controlled each of my objectives, pathfinders sheltered in a 2-story ruin searching for targets. Similarly, the small marine teams held the opposite objectives, the Speeder squadrons held the flanks, taking cover behind the treeline. The Terminators and the large Templar squad would advance to grab objectives.
Deployment and starting moves

My first turn saw 4 out of 6 Speeders downed, Finders negating their cover and missile pods and Rails doing the rest. I tried not to target the assaulting squads, as their frenzied doctrine would push them even closer with every casualty. The Templars rushed forward, their weapons mainly firing against my suits, stripping them of their Shield Drones.

Shas'O, the Templars are closing!
Against their aggressive move, a counter-aggressive thrust was commenced, mechanised Fire Warriors disembarked midfield to fire their powerful guns against the Astartes guarding the opposite objectives, while kroot mercenaries appeared on the back woods, finishing the Templar squad and threatening the enemy Objective.
Undaunted, the Templars kept firing, a Speeder unleashed a hail of frag missiles on the disembarked (and tightly packed) Fire Warriors, decimating the squad, while the pre-battle Litanies of Hate propelled the Astartes squad to commence a near-impossible assault (9 inches through rough terrain) and clear the building of an entrenched FW squad. That was a major breakthrough and a serious blow in the Tau defence lines and disorganized their main effort. Now the large squad was on our doorstep, rather unharmed, and thirsting for more Tau blood. It went on to kill the Broadside squad, turned on the other side's objective and destroyed a devilfish, a FW squad and the Pathfinders. At least the Shas'O managed to save his precious life!
The last stages of the battle saw the terminators dying, all but one Speeder destroyed and the small Astartes squad in the woods being pummelled heavily but surviving and securing the Objective.
Both had Line-Breaker, I had First Blood and the Templars controlled one Objective more ( 5-7 Defeat)

Second game against the Ruinous Powers, the Greater Evil!
Typhus with Terminator bodyguards, Slaanesh marines on Land Raider, traitor Marines on Rhino, Lascannon Predator, Lascannon Helbrute and a Zombie horde. Five Objectives.
Tau deployed, awaiting their rivals

 Transports were my first priority, they advanced up to the middle under the cover of darkness. Zombies crept to their objective, lingering in the ruined building, while the chaos anti-tank vehicles engaged the Hammerhead. Alerted by the Pathfinders' guiding markers, the Tau gunline tried but failed to stop the LR, which kept going and disembarked its passengers near the firing line. The overconfident Hammerhead was finally brought down, after failing miserably to harm its' enemies. Even the kroot, entering behind the Predator, were tank-shocked and routed, never to rally again. Combat on the other flank was going better, Fire Warriors pouring fire on the Zombies and the newly-arrived Typhous squad. Slaaneshi troops slaughtered the Pathfinders and advanced to assault the rear Crisis team. Competing to get first, pushing each other, they ultimately failed to reach the enemy. As a result, they were gunned down by the thankful XVs, praise the Aun'.. Now targeted by a multitude of weapons, the Nurgle terminators faltered, even Typhus himself was ripped apart by a powerful Rail hit. Having stabilised their lines, the Tau switched targets to the marine squad climbing the hill for the central objective. The enemies' numbers preserved them, and the few survivors claimed the hill objective.
Up to that point, I just had to order a squad to contest the Zombie-held objective, and the Tau would be winning by 6-3. But my "cunning and strategic" mind ordered the Fire Warrior squad to assault the Zombies and grab the objective. The 6 FW assaulted the 3 remaining zombies, lost 2 (ouch), did nothing and their brains were eaten... So a 6-3 became a 6-6 draw. There's always place for improvements!
Part 2 follows.

Δευτέρα 26 Νοεμβρίου 2012

Start engines!

Greetings from Chania, Crete, Greece!

I'm George (gaming name: Lance-a-lot* ) and I'm about to record my gaming experiences in the (game-wise) barren wastelands of Crete**. The following subjects should be covered:
- Warhammer (Fantasy & 40k)
- Flames of War
- Painting (ok, not that much to boast about..)
- Terrain modelling
- Background fluff ( mainly 40k universe)

* Lance-a-lot, stands for "a lot of lances".Back in the days of WH 6th ed., we were asked to choose a player name for our club's campaign, and with which to log-in to the campaign's new forum. For Bretonnians, we used to call Lance formations as simply Lances. "How many Lances do you field?" "3 large and 2 small of Questing and Grail" etc. I used to field MSU tactics (six-strong lances), lots of Lances..
Does the nickname Lance-a-lot sound Bretonnic? Check
Does it fit my playing style? Check
So has the "saga" begun. You'll happen to find that name in World of Tanks, Warseer etc

**A wasteland I tell you! Having been used to the, comparably, large gaming community of Athens for 6 years, I then moved to Crete devoid of any gaming hopes.. But there were gamers there! We had formed a core of 4, now we're down to 2, and next winter might be the start of one-man-battles. But until then..